Have you ever wished for a houseplant that brings a burst of tropical color into your home with minimal fuss? Meet the croton plant—a stunning foliage plant known for its vibrant, variegated leaves that can turn any indoor or outdoor space into a tropical paradise. With its bold patterns and striking hues, this eye-catching plant is more than just décor; it’s a statement piece.
But keeping those dazzling colors bright and healthy requires a little know-how. From light and water needs to the right soil and humidity levels, understanding the basics of croton plant care can make all the difference between a thriving showstopper and a struggling plant. Whether you’re a seasoned plant parent or a beginner looking to expand your indoor jungle, this guide will walk you through everything you need to keep your croton looking its best. Let’s dive in and uncover the secrets to lush, thriving croton leaves!
In This Article
| Attribute | Details |
| Common Name | Croton |
| Botanical Name | Codiaeum variegatum |
| Family | Euphorbiaceae |
| Plant Type | Evergreen Shrub |
| Mature Size | 3-6 ft tall, 2-3 ft wide |
| Bloom Time | Spring to Summer (rarely indoors) |
| Toxicity | Toxic to pets and humans if ingested |
| Sun Exposure | Bright, indirect light (some direct morning sun) |
| Soil Type | Well-draining, loamy, peat-based |
| Soil pH | Slightly acidic to neutral (6.0–7.0) |
| Flower Color | Creamy white, insignificant |
| Hardiness Zones | 10-12 (USDA) |
| Native Area | Southeast Asia, Pacific Islands |
Croton Plant Care: Essential Tips for Thriving Foliage
Caring for a croton plant doesn’t have to be complicated, but it does require attention to a few key factors. These tropical beauties thrive when given the right balance of light, water, soil, and humidity, ensuring their vibrant leaves stay lush and colorful. Whether you’re growing your croton indoors or outdoors, follow these expert tips to keep it healthy and thriving.
Light: Essential for Bright Colors
Place crotons in bright, indirect light to maintain their striking colors.
Too little light? Leaves may fade to green. Too much direct sun? They can burn.
Ideal placement: Near an east- or south-facing window or outdoors in partial sun.
Water: Finding the Right Balance
Keep the soil consistently moist, but avoid overwatering.
Check soil before watering—if the top inch is dry, it’s time to water.
Reduce watering in cooler months to prevent root rot.
Soil: The Perfect Mix for Growth
Use well-draining soil to prevent excess moisture buildup.
A mix of peat moss, perlite, and compost ensures proper aeration.
Maintain a slightly acidic to neutral pH (6.0–7.0) for best nutrient absorption.
Temperature & Humidity: Mimicking the Tropics
Keep temperatures between 65–80°F (18–27°C) to prevent stress.
Use a humidifier or mist leaves lightly to maintain humidity.
Avoid cold drafts and sudden temperature changes, which cause leaf drop.
Fertilizer: Feeding for Vibrant Leaves
To keep crotons bold and beautiful, they need the right nutrients.
Best Fertilizer:
- A balanced liquid fertilizer (10-10-10 or 20-20-20) every 4–6 weeks during the growing season (spring and summer).
- Reduce feeding in fall and winter when plant growth slows.
- Organic options like compost tea or fish emulsion offer gentle nourishment.
Overfertilizing Warnings: Can cause burnt leaf edges and weak stems. Always dilute fertilizer to half strength for safety.
By following these croton plant care tips, you’ll enjoy richly colored, thriving foliage that adds a tropical touch to your home or garden. Stay consistent with their needs, and your croton will reward you with bold, eye-catching beauty year-round!
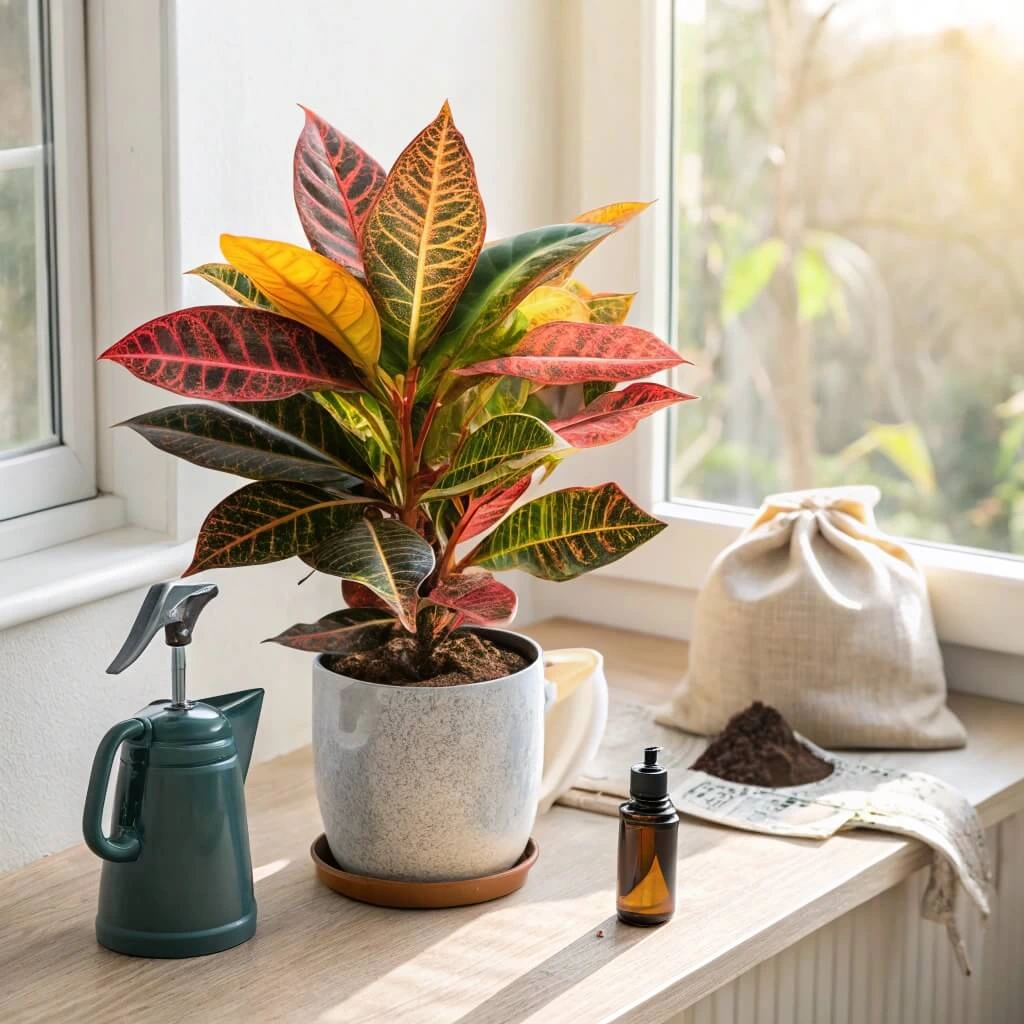

Types of Croton Plants: Stunning Varieties to Grow
One of the best things about croton plants is their incredible diversity. With vibrant leaves, bold patterns, and an array of unique color combinations, each croton variety brings its own charm to indoor and outdoor spaces. Whether you’re looking for deep greens, fiery reds, golden yellows, or speckled designs, there’s a croton plant for every aesthetic.
Here are some of the most popular croton varieties to consider for your home or garden.
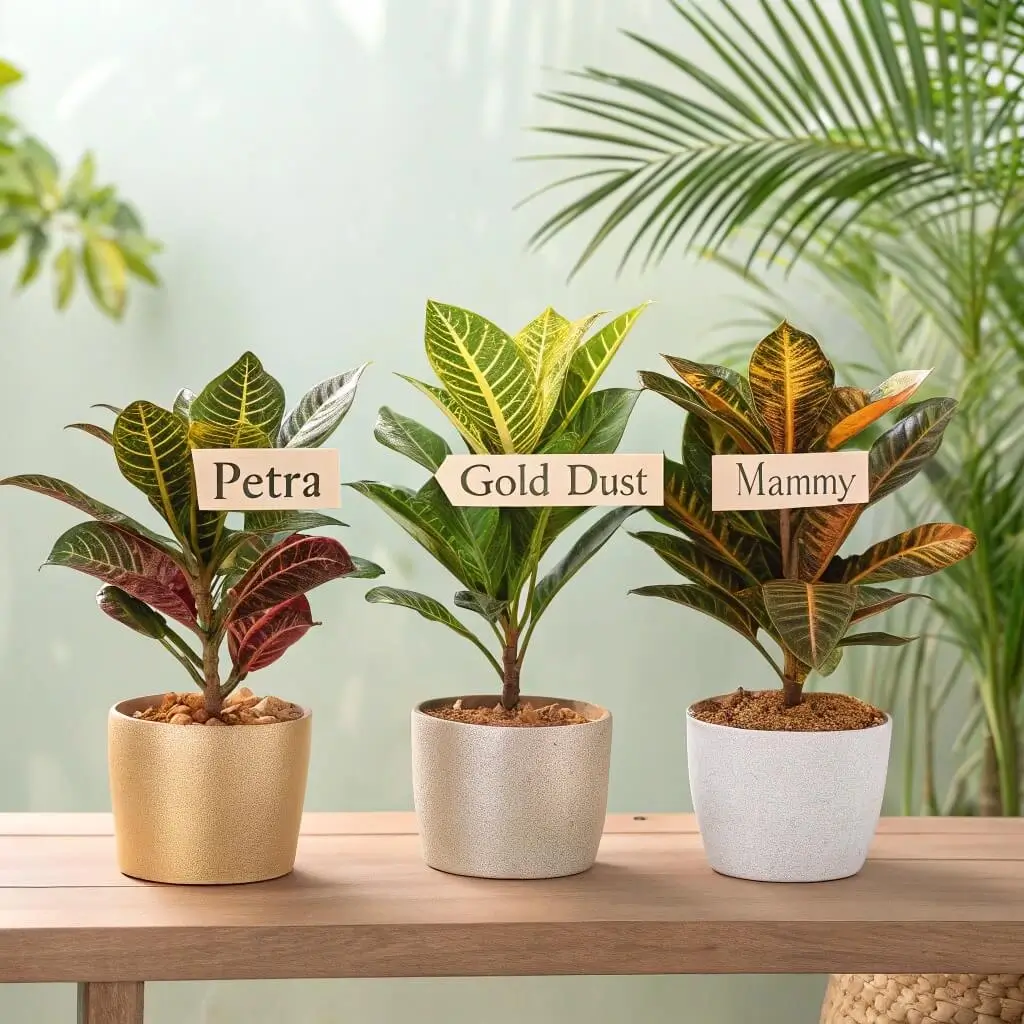
1. Petra Croton
Colors: Deep green leaves with vibrant yellow, orange, and red veins.
Best For: Indoor or outdoor spaces with bright, indirect light.
Growth: Can reach up to 4–6 feet when mature.
This classic croton variety is one of the most recognizable, featuring broad, oval-shaped leaves with distinct vein patterns in shades of yellow, orange, and red. ‘Petra’ is perfect for adding a tropical feel to homes or offices and thrives with regular humidity and warm temperatures.
2. Gold Dust Croton
Colors: Speckled green leaves with bright yellow spots.
Best For: Small spaces, tabletops, and compact planters.
Growth: Stays compact at around 2–3 feet tall.
3. Mammy Croton
Colors: Twisted, curly leaves in shades of red, yellow, and green.
Best For: Adding texture and variety to plant collections.
Growth: Averages 3 feet in height with dense foliage.
4. Zanzibar Croton
Colors: Long, slender leaves in red, orange, yellow, and green.
Best For: Modern, minimalist spaces or mixed plant displays.
Growth: Grows up to 3 feet tall with an elegant, bushy appearance.
Choosing the Right Croton for Your Space
When selecting a croton variety, consider:
✔ Light Conditions: Some need more sun for vibrant colors.
✔ Size: Compact varieties like ‘Gold Dust’ are great for small spaces.
✔ Humidity Needs: High humidity varieties thrive in bathrooms or near a humidifier.
No matter which croton plant you choose, proper care and placement will ensure its bold, tropical beauty lasts for years. So, which one will you add to your plant collection?
Pruning: How to Keep Your Croton Plant Healthy and Vibrant
Pruning your croton plant isn’t just about keeping it looking neat—it’s essential for healthy growth, vibrant foliage, and preventing legginess. Regular trimming encourages new leaf production, improves airflow, and helps maintain the plant’s bold, bushy shape. If you’ve noticed straggly stems, yellowing leaves, or overgrown branches, it’s time to give your croton a little pruning care.
Why Prune Your Croton?
Encourages new growth by redirecting energy to healthy leaves.
Prevents legginess, keeping the plant compact and lush.
Removes dead or diseased foliage, reducing pest and fungal issues.
Controls size, making it easier to manage indoors or in small spaces.
When and How to Prune a Croton
Best Time: Prune in spring or early summer when the plant is actively growing.
Tools Needed: Use sharp, sterilized pruning shears to prevent infections.
How to Trim:
- Identify leggy, yellow, or overgrown stems.
- Cut just above a leaf node or branching point to encourage new shoots.
- Remove no more than ⅓ of the plant at a time to prevent stress.
- Wipe off sap, as it can be irritating to the skin.
Pro Tip: Pinching for a Bushier Plant
For a fuller croton, pinch off new growth tips instead of cutting stems. This stimulates branching, leading to a denser, more vibrant plant.
By pruning regularly, your croton will stay healthy, colorful, and beautifully shaped—the perfect showpiece for your indoor or outdoor garden!
With regular pruning, your croton will stay bold, vibrant, and well-shaped year-round. A little trim goes a long way in keeping your tropical beauty thriving!
Propagating Croton Plants – Grow New Plants with Ease
Want to expand your croton plant collection without spending extra money? Propagation is an easy and rewarding way to grow new crotons from healthy cuttings. With the right method, you can successfully root new plants and enjoy more of their stunning, colorful foliage.
Best Time to Propagate Crotons
The ideal time is spring or early summer when the plant is actively growing.
Avoid propagating in winter, as growth slows, making rooting more difficult.
How to Propagate Croton Plants (Step-by-Step)
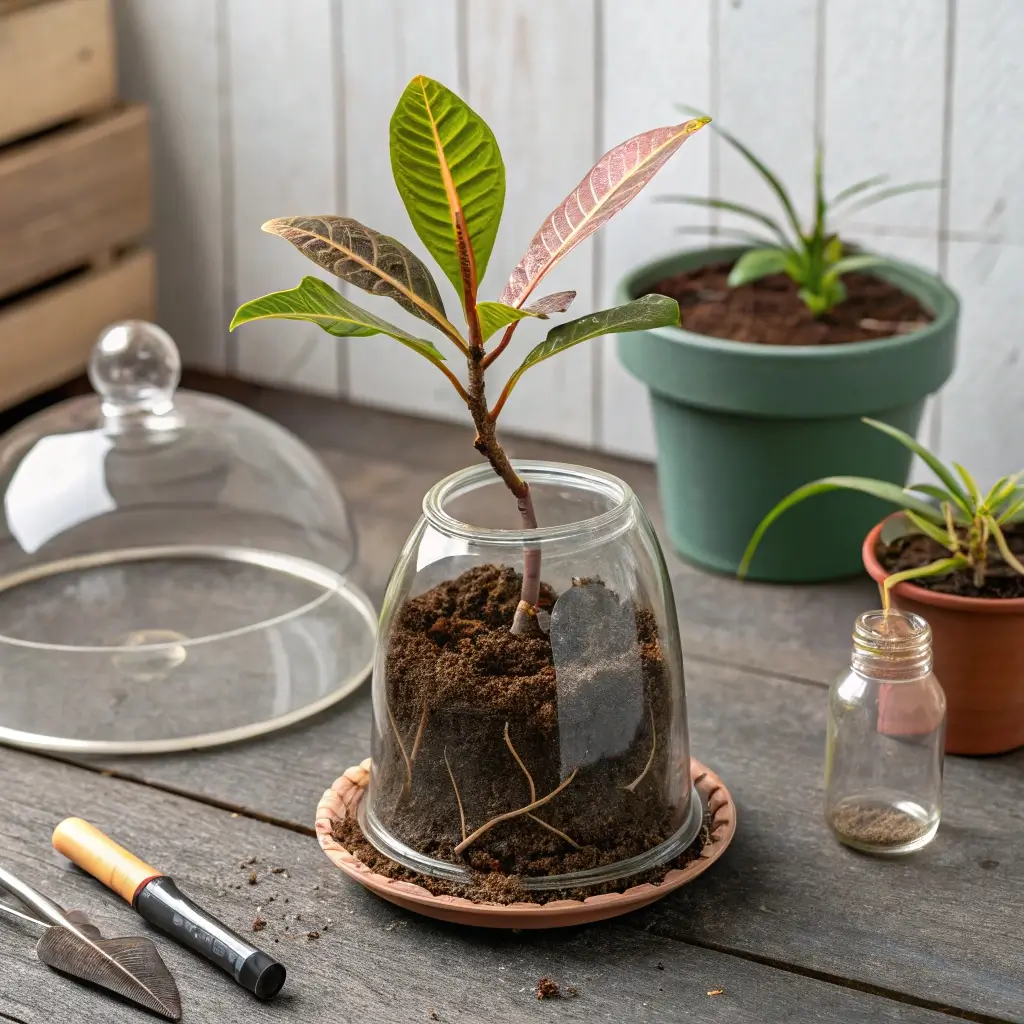
Choose a Healthy Stem – Select a 4-6 inch stem with at least 3-4 leaves.
Make a Clean Cut – Use sharp, sterilized scissors to cut just below a leaf node.
Remove Lower Leaves – Strip off the bottom one or two leaves to expose the node.
Dip in Rooting Hormone (Optional but recommended!) – This encourages faster root growth.
Place in Water or Soil:
- Water Method: Place your cutting in a jar of water, ensuring the node is submerged. Change water every few days.
- Soil Method: Plant the cutting in moist, well-draining soil and keep it warm.
Provide Warmth and Humidity – Cover with a plastic bag or humidity dome to retain moisture.
Wait for Roots – In 4-6 weeks, roots should develop. Once strong enough, transfer the plant to a pot with fresh soil.
By propagating crotons, you can enjoy new, thriving plants that bring even more vibrant color to your home or garden!
Potting and Repotting Croton Plants
Keeping your croton plant in the right-sized pot with fresh soil is key to its health and vibrant growth. Whether you’re potting a new plant or repotting an older one, proper technique ensures strong roots and lush foliage.
When to Repot a Croton
Every 2-3 years or when roots start growing out of the drainage holes.
If the plant looks stunted or dries out too quickly.
When soil becomes compacted and drains poorly.
How to Pot or Repot a Croton (Step-by-Step Guide)
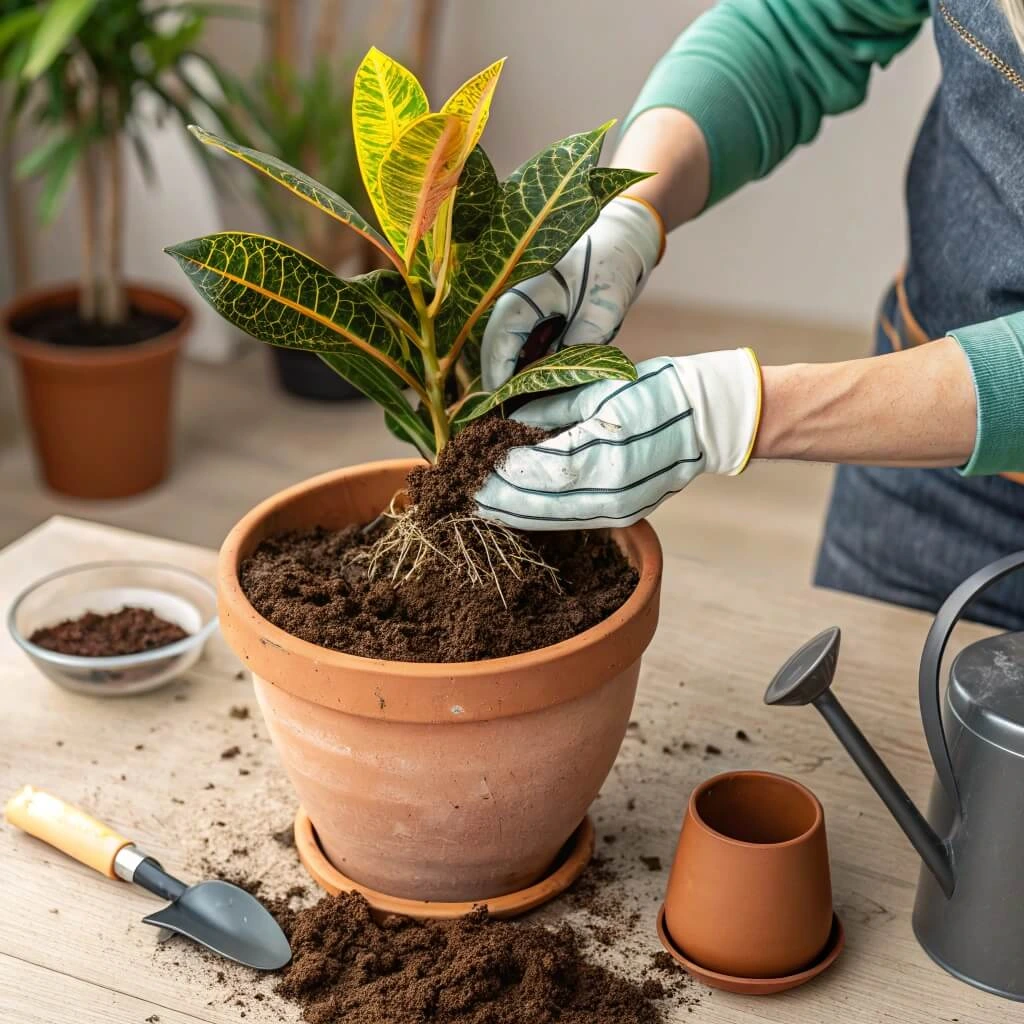
Choose the Right Pot – Use a container with drainage holes to prevent root rot. A terra cotta or plastic pot works well.
Pick the Right Soil – A well-draining mix of peat moss, perlite, and compost keeps roots healthy.
Loosen the Roots – Gently remove the plant from its old pot and shake off excess soil. If roots are tangled, loosen them slightly.
Place in New Pot – Fill the new container with fresh soil, positioning the croton at the same depth as before.
Water Thoroughly – After repotting, water deeply to help the plant settle into its new home.
Keep in Indirect Light – Allow the plant to adjust for a few days before exposing it to bright sunlight.
Repotting refreshes the soil, promotes stronger growth, and keeps your croton looking its best. With proper potting care, your plant will continue to flourish with bold, colorful leaves!
Overwintering Croton Plants
As temperatures drop, croton plants need extra care to survive the colder months. Since they thrive in warm, tropical conditions, exposure to chilly weather can cause leaf drop, stunted growth, or even plant death. With a few simple steps, you can successfully overwinter your croton and keep it healthy until spring.
How to Protect Crotons in Winter
🌡️ Maintain Warmth: Keep indoor temperatures between 65-80°F (18-27°C). Avoid placing crotons near drafty windows, AC vents, or doors.
💦 Increase Humidity: Winter air is dry, so use a humidifier, a pebble tray with water, or mist the leaves lightly to maintain moisture.
☀️ Provide Bright Light: Shorter days mean less sunlight. Place your croton near a south-facing window or supplement with grow lights.
💧 Adjust Watering: Water sparingly—only when the top inch of soil is dry.
🌿 Avoid Fertilizing: Crotons go dormant in winter, so hold off on fertilizing until spring when growth resumes.
What If My Croton Loses Leaves?
Leaf drop is normal in winter due to seasonal stress. Continue proper care, and it should bounce back in spring.
If leaves turn brown and crispy, the air is too dry—increase humidity.
If stems become soft or mushy, reduce watering to prevent root rot.
With the right winter care, your croton will survive the cold months and return lush and vibrant when warmer days arrive!
Common Pests & Plant Diseases in Crotons
Even though croton plants are hardy, they’re not immune to pests and diseases. Spotting problems early and taking quick action can help keep your plant healthy and thriving.
Common Pests That Attack Crotons
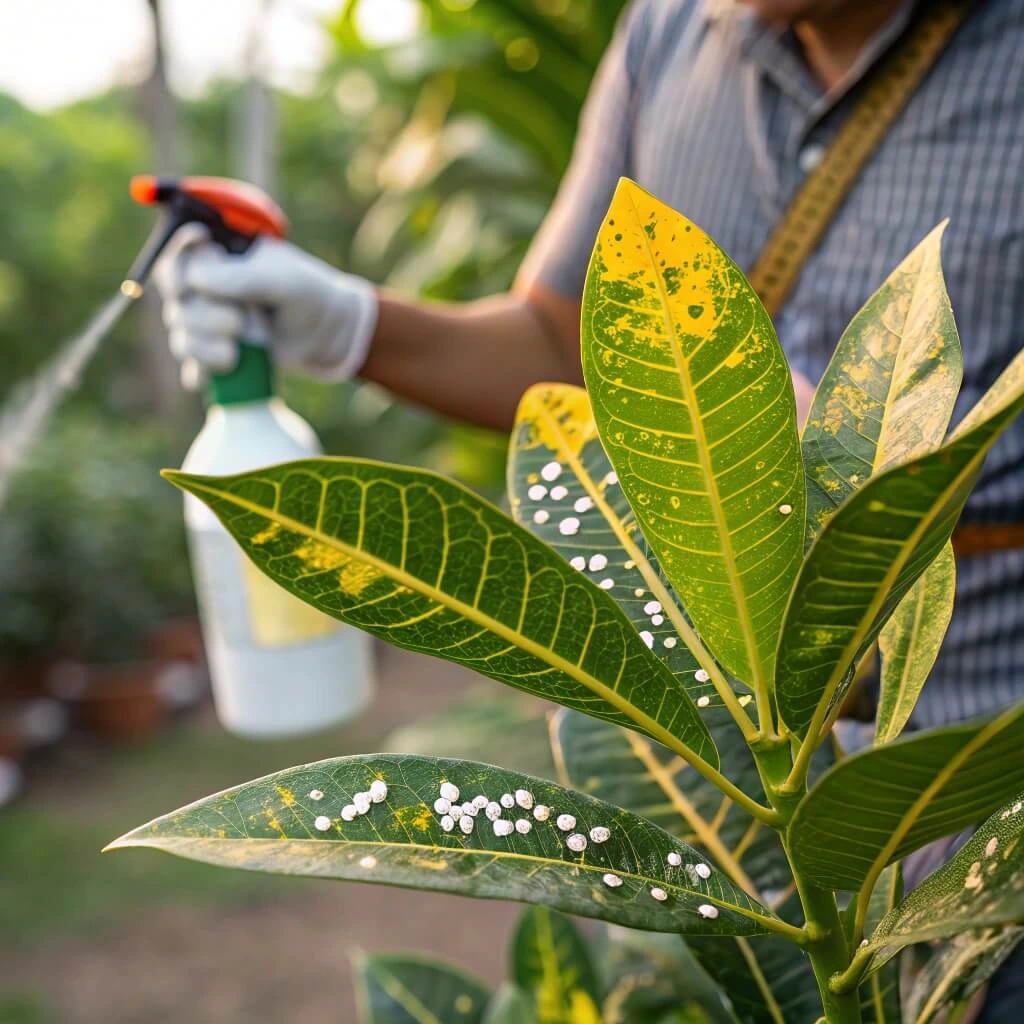
🐜 Spider Mites – Tiny pests that cause yellow speckled leaves and fine webbing.
🚨 Fix: Wipe leaves with a damp cloth, mist regularly to increase humidity, or use neem oil.
🪲 Mealybugs – White, cotton-like insects that cluster on stems and leaves.
🚨 Fix: Dab affected areas with rubbing alcohol or spray with an insecticidal soap.
🦟 Scale Insects – Hard-shelled bugs that suck plant sap, causing leaf yellowing.
🚨 Fix: Scrape them off gently or use a horticultural oil spray.
Common Diseases in Crotons
Root Rot – Caused by overwatering, leading to wilting and black, mushy roots.
Prevention: Use well-draining soil, water only when the top inch is dry, and ensure proper drainage.
Leaf Spot – Fungal or bacterial infections that create brown or black spots.
Prevention: Avoid overhead watering, remove infected leaves, and improve airflow.
Powdery Mildew – White, powdery residue on leaves, common in humid conditions.
Prevention: Reduce humidity slightly, increase air circulation, and treat with a fungicide if needed.
By inspecting your croton regularly and using natural solutions, you can prevent most pests and diseases, keeping your plant lush, colorful, and healthy! 🌿✨
How to Get Croton Plants to Bloom
While crotons are primarily grown for their vibrant foliage, they can also produce delicate, star-shaped flowers under the right conditions. However, getting a croton to bloom requires optimal care and patience.
Bloom Months: When Do Crotons Flower?
🌸 Crotons typically bloom in late spring to early summer, though indoor plants may rarely flower.
🌸 Flowering depends on maturity, lighting, and overall health.
What Do Croton Flowers Look and Smell Like?
Small, cream or white flowers grow in clusters along long stems.
They are not strongly scented and may go unnoticed compared to the plant’s bold leaves.
How to Encourage More Blooms
✔ Provide Bright Light – At least 6 hours of sunlight daily promotes flowering.
✔ Use a Phosphorus-Rich Fertilizer – A bloom booster (high in phosphorus and potassium) can stimulate flower production.
✔ Keep Temperatures Warm – Maintain 65-80°F (18-27°C) for ideal growth.
✔ Avoid Stress – Sudden changes in temperature, drafts, or inconsistent watering can prevent blooming.
Caring for Croton After It Blooms
Deadhead spent flowers to direct energy back to foliage growth.
If flowers reduce leaf vibrancy, consider pruning the bloom stalks.
While croton flowers add a subtle charm, their true beauty lies in their striking leaves. Whether they bloom or not, a well-cared-for croton remains a stunning tropical showpiece!
Common Problems With Croton Plants
Even with the best care, croton plants can sometimes run into issues. From dull leaves to leaf drop, knowing how to troubleshoot common problems will help keep your plant healthy and vibrant.
1. Dull Leaf Coloration
Cause: Insufficient light, nutrient deficiencies, or lack of humidity.
Solution: Place your croton in bright, indirect sunlight for at least 6 hours daily. Use a balanced liquid fertilizer every 4 to 6 weeks during the growing season. Increase humidity levels with a humidifier or pebble tray.
2. Curling or Rolling Leaves
Cause: Underwatering, low humidity, or extreme temperature changes.
Solution: Water when the top inch of soil is dry, and maintain temperatures between 65-80°F (18-27°C). If indoor air is too dry, mist the plant lightly or use a humidity tray.
3. Leaf Drop
Cause: Stress from overwatering, underwatering, drafts, or sudden relocations.
Solution: Keep watering consistent—avoid letting the soil dry out completely or become too soggy. Keep the plant away from AC vents, cold drafts, or direct heat sources. If moved, allow time for adjustment.
Pro Tip: If your croton experiences multiple issues at once, check for pests, as infestations can also trigger these symptoms.
By staying attentive to your croton’s needs and environment, you can quickly resolve issues and ensure your plant remains a stunning focal point in your home or garden!
FAQ
How do you care for a croton plant indoors?
To keep your croton plant thriving indoors, place it in bright, indirect sunlight, maintain warm temperatures (65-80°F/18-27°C), and keep the humidity levels moderate to high. Water when the top inch of soil is dry, and use a well-draining soil mix. Avoid cold drafts and sudden temperature changes to prevent stress.
Why are leaves falling off my croton?
Leaf drop is usually caused by stress, which can result from overwatering, underwatering, temperature fluctuations, low humidity, or sudden changes in environment. Ensure your croton gets consistent care, including regular watering, stable temperatures, and proper light exposure.
Do croton plants need full sun?
Crotons prefer bright, indirect sunlight, but they can tolerate some direct morning sun. Too much direct sunlight can scorch the leaves, while too little light may cause the plant to lose its vibrant colors.
Where is the best place to put a croton plant?
Place your croton near a south- or east-facing window where it gets plenty of filtered sunlight. Keep it away from cold drafts, air conditioning vents, and heating sources, as sudden temperature changes can stress the plant.
Do crotons like heat?
Yes! Crotons are tropical plants that thrive in warm temperatures (65-80°F/18-27°C). They do not tolerate cold weather or frost, so keep them in a warm environment with stable conditions.
What is indirect sunlight?
Indirect sunlight is bright light that doesn’t hit the plant directly. It’s typically filtered through a sheer curtain, reflected off walls, or diffused before reaching the plant. A good example is placing your croton near a bright window but out of the direct sun’s path.
Conclusion
Caring for a croton plant is all about balance—giving it the right light, warmth, humidity, and water to keep its bold, colorful foliage looking its best. Whether you’re nurturing an indoor croton or adding one to your outdoor garden, consistency is key.
Have you found the perfect spot with bright, indirect sunlight? Are you keeping the soil moist but not soggy? Small adjustments can make a big difference in preventing leaf drop, dull colors, or curling leaves. And if your croton faces challenges, now you have the knowledge to bring it back to lush, vibrant health!
With a little attention and care, your croton will reward you with stunning tropical beauty year-round. So, are you ready to watch your croton thrive?

